I’m sure it must have annoyed you at some point. You found a CD with some very important files. Unfortunately it is a bit scratched, and your drive refuses to read the disk properly. And then? Your files are lost. Forever?
Nope! There may be a solution. In fact, there are several solutions. Some work, some are dubious, and some don’t. So, I’ll be listing some things you can do to recover files from your CD or DVD if ever it is scratched, or otherwise corrupt. Mind you, if your media has been scratched polished by something like sandpaper, you won’t be able to recover anything. What I mean is, you can get back some files provided the disk is not excessively damaged. Also, one of these solutions is also applicable to other drives, like floppies, flash disks and hard disks.
Briefly? You will be able to read files from damaged CD or DVD disks, or maybe hard-disks and other drives. As with most risky things, try at your own risk! 😀
1. Roadkil’s Unstoppable Copier
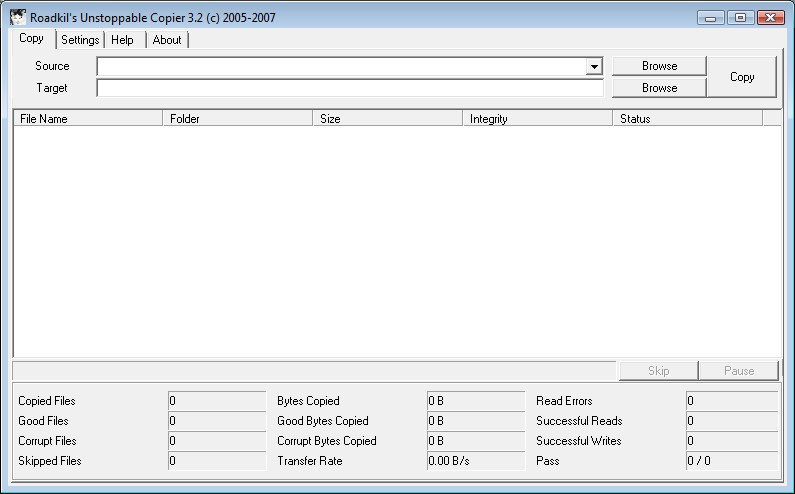
Readers, today, I introduce you to one of my favourite softwares that has saved my files countless of times. Roadkil’s Unstoppable Copier will try to copy every file you point it to, to another location of your choice. Basically, I think it reads sector by sector, copying the good ones, re-reading the bad ones trying to extract data, until the file is copied, or totally skipped if it is fully damaged.
Many times, this cool software has recovered files when Windows has spit its “Cyclic Redundancy” error on me. I was able to recover files with 95% integrity, but even those with just 20%. Briefly, it will recover what it can, when normally, Windows would just stop.

It’s very easy to use and master. Just choose a source, choose a destination (target) to copy the files recovered to, and click the copy button. That’s it. However, I’d advise a visit to the Settings tab first. I find that checking the “Undamaged files First” button, and moving the big slider nearer to Fastest Data Recovery (around 75% right) works best for me. Choose what’s best for you. Also, set the number of “Maximum Retries” to 2 or 3.
For best recovery, uncheck the “Maximum Retries” box, and move that slider to Best Data Recovery. Mind you, it will take a very long time then, attempting to get back every small bit of data it can, even if it has to re-read the same sector several times.
Roadkil’s Unstoppable Copier also works for floppies and other kinds of disks.
2. Make an Image
This trick is mainly for CDs and DVDs. Basically, what you do is make an image of your media. You can use several tools, like Nero Burning ROM, CDBurnerXP, or your favourite burning tool, or my favourite, ImgBurn. An important thing is to set “ignore read errors” or something like that. Most burning tools have that option, and you need to look for it, and check/activate it. For example, in Nero, it’s under the “Read Options” tab. Then make the image.
Afterwards, use an application like Daemon Tools to mount the image and copy files from it, or IZArc to extract the contents of the image, just as you would for a ZIP archive.
With this method, and if you have activated the “ignore read errors” feature, you should be able to recover most, if not all files. It is less effective than the Unstoppable Copier though.
3. Risky methods!
Again, some strange methods that work only for scratched optical disks. Personally, I used the wet soap method only once, and am not ready to try it a second time unless I really, really must. It worked though. There are 4 ways in fact. One is the wet soap method, the dry soap method and the toothpaste polish method. The last method is the lamp method. If I were you, I’d avoid the following 4 methods! 🙂
Wet soap method: Literally, wet your hands, put some soap on them, and rub on the underside of the disk, where the laser will strike. The soap should be thick lathe. After that, take some dry soft cloth or tissue paper, and wipe the soap off. What this method does in fact is that it fills the scratch pits so that the drive laser can better read through them. After the disk is dry again, put it in the drive, and try opening it.
Dry soap method: Take some dry soap. Rub it on the underside of the disk in small spirals. Find a soft piece of soap, else you will scratch the disk even more. Take a soft cloth or tissue and wipe the residue off. Put the disk in the drive, and try reading.
Toothpaste method: Same as the soap methods. Put some toothpaste on the disk, and rub it in lines going from centre of disk to the edge. The toothpaste should be non-grainy. I heard wax or Vaseline also works! BEWARE! This method will actually polish the disk, which might damage the disk even further.
This method is RISKY, and I’d avoid it if I were you. Do at your own risks!
Tip: When cleaning optical media with cloth or tissue, DO NOT wipe in spirals! Instead, wipe in lines, going from the centre of the disk, to the outer edge.
Lamp method: I read this method off WikiHow some time back. Basically, you place your scratched disk near a 60W lamp, scratched face towards lamp around 10cm from it. You place your finger in the centre hole of the disk, and slowly rotate it. After the disk is hot, you place it in the drive and try reading it. I’ve not tested this method, so I cannot say if it works or not.
4. Buy a cleaning / repairing machine
If you got lots of scratched media, you can invest in some repairing machine. Here are some you can get off Amazon. These are usually called “Disk Scratch Removers”, “Disk Repair Kits” or something like “Disk Polishers”. I don’t have one, so don’t ask if it works.
Now, after you have recovered your files, you could burn them on another new disk, because the scratched one will probably not hold for very long.
That would be it. For me, I usually use Roadkil’s software, and if it’s taking too long, or if I’m in a hurry, I use the image method. Roadkil rarely failed me. Of course, there are more complex methods for recovering data, specially off hard-disks. I’ll leave this for you to find out, or maybe in a post later.
Thanks for reading! Comments appreciated. Oh, if you got more methods, post them as comments. I might add them if relevant. 🙂
Tags: Damaged Files, Disk Polisher, Remove Scratches, Scratched disks, Unstoppable Copier